
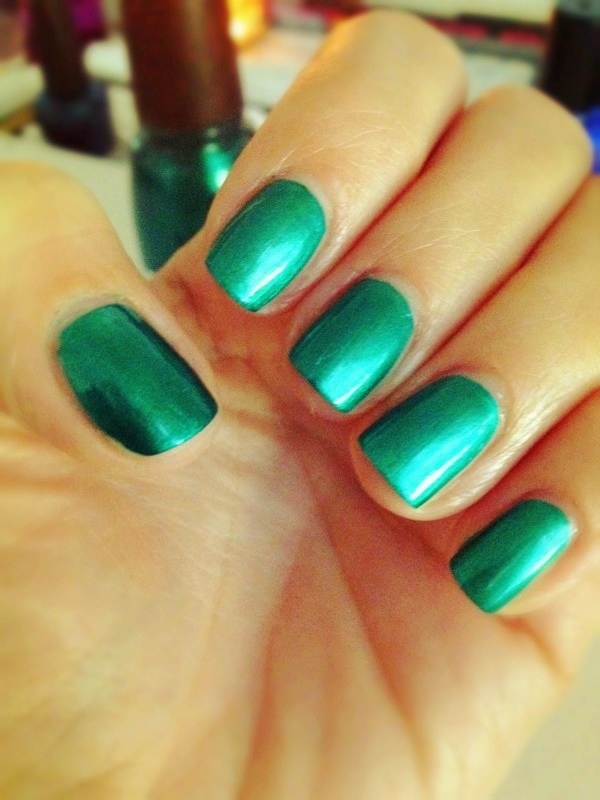
This Dress and
necklace served as the perfect amount of rich color and shiny details
that make this manicure not only baroque but the type of manicures I
love...

What You'll Need:
Top Coat: Chip Skip and Sally Hansen Top to Bottom (Again very important when using dark colors to prevent stains)
An Emerald Polish : I used China Galze in, "Outta Bounds"
Black Nail Art Pen: Sally Hansen in "Black Noir"
Silver Glitter Polish: Essie Luxeffects in, "Set in Stone"
Silver Striper: Sinful Color Nail Art in, "What A Night"
Sapphire Blue Polish: OPI in, "Yodel Me On My Cell"
Top Coat: Seche Vite (see instructions at the bottom of option on)
Cotton Swabs and acetone for clean-up
What You'll Do:
After Prepping the nails (see option one), Apply Chip skip and base coat.

Apply 2 thin coats of emerald green polish, allow time to thoroughly dry, about 5-10 minutes.
After
nails are dry draw a black brocade print, this does not have to be
perfect or identical for each nail, I studied the brocade on the LANVIN
dress and simplified it.

After your black brocade is dry, touch up any spots with your emerald polish.


Apply a dot of your sapphire polish in the center of your silver dot.

Apply a rapid drying top coat

And
VOILA! a Very Baroque and VERY chic manicure for Fall! Enjoy, and Stay
tuned for the remaining 3 Baroque Manicures in this series!


What You'll Need:
Base Coat: I used Chip skip Orly top to bottom-This is very important because blue pigments stain more than any other nail lacquer
Royal Blue Polish: I used Color Club in, "INSTA-THIS"
Rose Gold Polish: I used Orly in, "Rage"
Copper Glitter Polish with multiple sized flecks: I used Orly in, "watch it glitter"
Royal Blue small round beads: One for each nail. I found mine at the craft depot for jewelry making
Tweezers: Helpful for applying the beads to wet polish
Fast Drying Top Coat: I used Seche Vite
What You'll Do:
First
prep the nail, a long length really adds to the drama so I had to let
mine grow out for a week before I did this.

Apply
your base coat and allow a it to dry, make sure you wrap your free
edges with base as well to prevent staining, Apply 1-2 coats of blue
polish (I only needed one because color club tends to be highly
pigmented giving excellent coverage in a single coat.

Apply your glitter coat, just one, we want the beads to be obvious so too much glitter will distract from it.

Now for some top coat multitasking, ***Seche Vite (see side note)
can also we used as an adhesive for nail art, so while your nails still
wet a carefully place one blue bead centered at the top of each nail
bed and allowed everything to dry for about 2-3 minutes.

After
your beads are on and you're all dried, apply a drop of rose gold
polish just to the top of your bead leaving the blue base to blend in
with the polish below, It should start looking like a metallic pearl or
gold bauble at this point.

After
your rose gold bead dries add a bit of the copper glitter flecks to
give it some depth and detail. Try and get a few big flakes on each
bead.

***Note on Seche Vite. SV should be used on somewhat wet polish, its a rapid
drying leveling lacquer for professionals so in order for it to work
optimally you'll want to use it correctly. Here are a few tips on how to
use it right and make it last longer.
I had this girl say she
didn't
love this top coat not to long ago, and it was because she wasn't using
it right, wasn't beading it at the top or wrapping the free edge, and
left the lid open way too long which turns it to cement and didn't know
it has to be
broken down every so often with its thinning agent. By far it is the
BEST top coat but its a waste of money if you don't use it correctly.
Also, don't get SV on your skin, it contains some funky chemicals, if
you do get some on there have a corrector pen or acetone soaked cotton
swab on hand, sorry for that long nail lesson, I just don't want you
guys wasting money on a product just because you didn't know the correct
way to use it***
Fade Out French Nail

What you'll need:
Rose Gold-Orly Rage
Off Black-OPI-Suzi Skis In The Pyrenees
Top Coat-Seche Vite
Make-up Sponge
Q-Tip and Acetone for cleaning up
What you'll do:
Paint
one to two coats of a metallic rose gold polish and allow to thoroughly
dry, I originally wore this rose gold for a few days and once it
started to chip and wear I did this fade out black to lengthen the wear
of my manicure. Apply a small about of black polish to make up sponge
and gently blot off any extra before working up towards the top of the
nail, apply as many needed layers to get desired opacity. After the
black is dried apply a high shine top coat and allow to dry.


And
there you have it a fast funky manicure! I love paring this look with
an edgy piece of jewelry that compliments the metallic...


What you'll need:
Comb
Styling Cream-I use Moroccanoil Hydrating Styling Cream
Heat Protectant-I use Redken Sooth Down Heat Glide
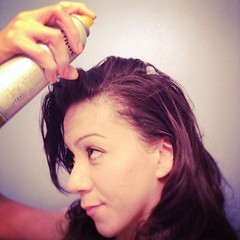
Hair Spray-I use Rusk W8less Plus Extra Strong Hold
Flat Iron-I use a CHI Air
Curling rod/iron-I use a ConAir classic
What You'll Do:


After the first section is straightened you'll be ready to curl, this is where it gets tricky. You'll want to curl away from your face, so the helix of your curl will face back (think 70's feathered hair). Once the hair is on the rod you'll want to twist as you lossen the hair from the rod and pull downward this is going to twist the curl tight. This is the secret to voluminous waves as oppose to prom curls.


Now
Continue to work through each section doing the same, remember keep
your curls facing back and away from your face. I usually spend about 3
minutes each section, so I'm done with the look after 12 min or so I usually allow the curls to all cool while I get dressed or do my make-up.

Once
you reach the top sections You'll want to pay attention to your face
framing strands, this technique is a bit different. instead of pulling
back you'll want to pull up when you curl, hold the hair there for a few
seconds and slowly allow the curl to drop from the iron (there is no
pulling or twisting here).


Allow that dropped curl to cool and then pull it apart mixing it with the bottom section.

Spray that section lightly and tousle it a bit with your hands.


Now
in the back of the top sections its business as usual, like the bottom
you'll want to twist as you curl and slightly straiten the ends as you
release, allow the wavy curl to cool and finger comb and spray.


After
spraying that final section with spray make sure everything is
intermingled and tousled and touch up any pieces with spray or heat if
needed, but rememeber these are sexy soft waves NOT prom curls! 

Voila!
DIY Beauty Branch:

What You'll Need:
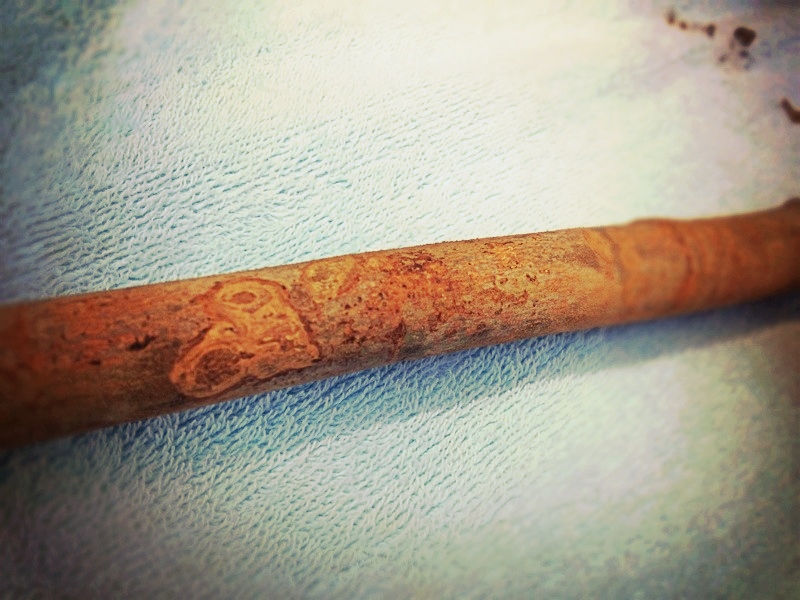
Sturdy dry branch
Pruning sheers (I lucked out and found this perfect branch already in a pile)
Sand paper (grain size 70c or above)
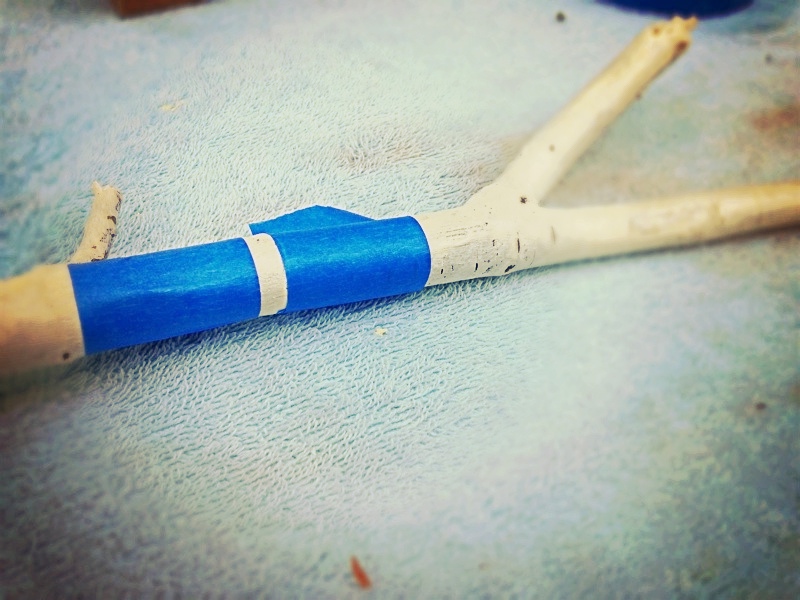
Painters blue tape
Assorted medium to large size paint brushes
Standard white (for priming) and assorted colored acrylic paint
Small nail studs and hammer
Jewelry craft or Crazy glue
Small baubles for nail heads
Tweezers
Scissors
White ribbon (or rope depending on your taste)
What You'll Do:
What You'll Do:
After finding an adequate and sturdy branch, (mine was in this old wood pile out back) you'll want to trim off any leaves and make sure its free of any mold and allow is to dry out totally. After trimming off any scraggly bits that could cause scrapes you'll need to sand your branch. I used 70c grain paper but anything that removes the outer dead crumbly bark will work, and make it easier to paint. Make sure you get the knots and small branches as well.

After your branch is nice and smooth paint white as a base color, you could also use primer for this step. After priming allow about an hour for the branch to be completely dry, this is important because you'll be taping off sections to paint.


During this time choose colors you want to use or play around with design and pattern ideas. I decided on striping 4 of my favorite Reeves colors but added one part Reeves titanium white for every two parts color to mellow it out a bit. The colors I used were: Blue Lake, Lemon Yellow, Veridian Hue, and Violet

After your branch is thoroughly dry tape off sections with your painters tape, you can allow dry time and overlap with more tape or free-hand small bands as I did after the initial large sections were dry. After You've totally finished your painting and removed your tape, touch up any spots with your white priming color, and allow a few hours for that to dry as well before hammering your nails in.


After everything is dry choose the spots you'd like to add nails (you could also use thumbtacks or small door handles, or even hooks, have fun with it! Ive seen various versions on pinterest). Once you've hammered your nails in add a bit of craft/crazy glue to the base of the nail, just to assure it doesn't move if you add heavy jewelry. Paint the base of the nails white (optional, again, this was what I liked but you can play around and have fun with it). After the nails are dry add your baubles to the head of each nail, I chose small clear glass beads because it complimented the ribbon I used to hang my branch. You'll want to glue on your baubles with tweezers so you don't end up with a hand full of beads and glue.


Once your nail heads are all dry add your ribbon or string. I chose white satin ribbon but again, have fun with it and use anything from rope to twine to (faux) leather/suede scraps. You can also play with the knotting, I tied a double knot but then looped around a bow and trimmed the excess ribbon.

Find a nice spot, I used the back of a door but will be playing around with different spots. Add your jewelry and Voila! Your very own beauty branch!

Hope you enjoyed, I'd love to see your take on the beauty branch, its fun seeing how everyone puts their own spin on it and personalizes them.
Inspired by a recent TBD post on gold leafing nails, I found a quicker and easier way to get the same look.
All you need is a bright color nail polish and paint as usual giving extra time to really dry all the way.

Then take one nail sticker in a metallic shade, like silver, gold, or rose gold. and cut it diagonally,

and adhere to each ring finger, trim off edges and file the free edge a bit to clean it up if needed.

Thats It!

I don't know about you, but I always have left over stickers after I'm done with the pack, this is an easy way to use all of the product without wasting random sizes. Also if your a few days into a salon mani and chip one finger, make that finger the sticker nail and enjoy a few more days before having to repaint chipped polish.
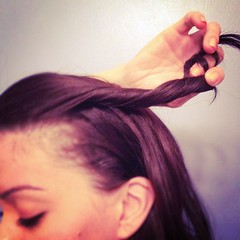
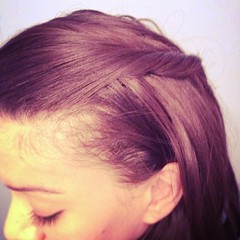
Spray or apply dry shampoo and brush out any tangles.Take the front section of your hair where it naturally parts and twist back and secure with a pin. Pull all hair to one side, grab one section braid and secure. Now section into 3 parts (one section being the braided piece) and braid normally. The braided section within the large braid will offer texture. Secure the end with a clear elastic.
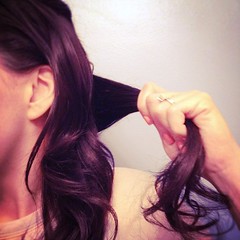

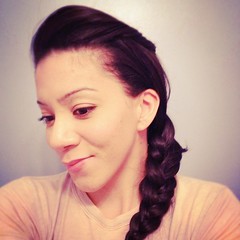
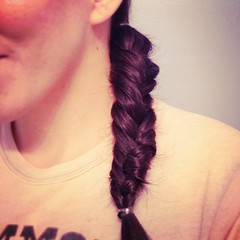
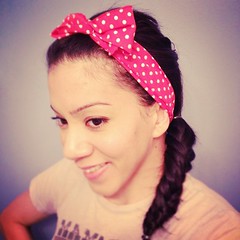
Pull brushed hair to one side and secure in low side ponytail. Separate ponytail into two sections, and fishtail braid (if you aren't familiar with the fishtail braid check out this DIY video). Secure the end with a clear or hair colored elastic. Take your scarf or hair band and apply center to nape of your neck, meeting the free ends at the top of your head. twist or tie into a small bow, tucking in free ends. This is easiest with a wire insert but can be done with a regular scarf as well. Tug a little at the exposed hair up front and at the braid to give a little texture and volume.

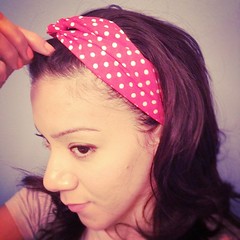
This is the easiest! Simply sleep in one of the above braids to allow a natural wave to form. the next morning take out your braid and tousle the hair. With a scarf wrap from the nape of the neck, twist at the top of the head and tie, tucking the free edges under the band. After you have the band on tug a bit at the front of your hair to give a bit of texture. With a small pin or clip pull back half of the hair and secure, you'll want to do this a bit higher than usual because you want a little volume or hump- think Bridget Bardot.


Remember to clean your nail tools often (alcohol is great for metals) and store them in a clean dry place. Also most people (even nail enthusiast) do not realize that you can wash your files, I swear by Ms Manicure's on the goes, they can be rinsed with water and gentle soap, I let them dry back out for a day before using them again.
A basic nail kit is a good place to begin, the products I have found best for my dry skin and nails are:

- Nail Cutters-I rarely use these because I file almost every other day, but included it anyway.
- Sally Hansen Gel Cuticle Remover-Removes cuticles so well I rarely have to use trimmers.
- e.l.f. conditioning cuticle almond oil-I keep this in my purse and try to use it daily to keep my nails healthy and moisturized.
- True Blue Spa "Aren't You Cuticle" -I only use this in the winter months in place of the e.l.f. but figured I'd include it.
- Plastic nail stick-I prefer this to the traditional orange stick because it can be sanitized and cleaned after each use.
- A metal cuticle pusher-I use this after the cuticle remover has been rinsed off to remove any dead skin that didn't get sloughed off, search around and find what best fits your nail, me and a friend believe the ideal metal pusher is roughly the shape of your own thumb.
- Cuticle cutters-To trim hang nails if necessary.
- Ms Manicure nail file boards-I prefer travel size because I have small hands and find these easier to grip.
- A double sided buffer-When polishing only buff, but in a natural manicure like this one you'll want to buff to a high shine.
- Eucerin Calming Cream-Where to begin! this is my favorite hand moisturizer, and is always in my bag.
- Shown below is a dish for soaking (I use an old corn cob holder because it fits both hands at the same time) And a gentle soap. I always use lavender or peppermint soap-I will post later about why I switched to all natural soaps, more specifically this South Austin Brand, but for now believe me it is GREAT for hands/nails.
Starting with washed hands (clip them first if needed) clean out underneath the nail bed with the plastic nail stick:

Apply Cuticle remover and allow to sit for about 45 seconds to one minute (but not longer):

Rinse and soak for a few minutes in lavender or peppermint soapy water.


Remove any dead skin remaining by gently sloughing the nail while pushing cuticle back with metal cuticle pusher, and if necessary clip any hang nails with clean cuticle cutters:


File the nail (Always in one direction to not fray your nail edge). I like to keep my nails short with a rounded squared edge, but try to shape based on the natural shape of your nail.

Buff your nails. At this point if your going to be painting (we will get into that next week) stop.

If you are going to be keeping your nails natural then buff to a high shine on the second side of your buffer.
Remember to moisturize your hands, it will keep them looking and feeling healthy.
There you have it your Easy Peazy natural manicure:


I find this style a bit easier than the "Gibson". Start with brushed hair, make a natural side part (I let the hair naturally part with my atomic cowlick). Take the larger section and begin twisting back loosely, grabbing more hair as you go, at about 1/2 inch behind the ear secure your twist with a few bobby pins. You can smooth any pieces that have not been caught in the twist with more pins.

On the remaining section of hair do the same twist technique grabbing sections as you go till about 1/2 inch behind the ear. This twist will be significantly smaller than your first so remember not to twist as tightly as the larger section.

Now comes the easy part grab all the hair from each twist and remaining hair and gather at the nape of the neck and pull and secure into a ponytail (aim for your pony to be level with the twists or lower). Twist the ponytail into a bun (or knot) and secure with bobby pins. Do a little spritz of hairspray to help with any straggler bits and VOILA! Your have easy peazy summer hair.


I usually head down to the local craft depot and pick through string and beads for hours, however these supplies are simple and you may already have them.
Silk or Organic Cotton string 1.99 (I've tried hemp and it just wasn't soft enough to weave around the beads).
Metallic beads .99 for15 (I used silver here but use any assortment to personalize it)
Metallic Ring Posts 2.99 bag of 3 (You'll need pronged ones, but get an assortment for later projects).

I noticed that a knitting needle is needed sometimes to weave frayed string through prongs, but feel it out as you go, you may be able to just use your fingers.
Take about a 4-5 inch piece of string and thread on one bead, thread the string through the first prong and then wrap the string back around that prong, this will secure the first bead into place. Do this again for your second bead and prong. .
.


No comments:
Post a Comment
Thanks for sharing!